How To Make a SPOOK-tacular Pumpkin
Oct 20, 2017

Calling all ghouls! Are you ready to carve out some good times this hallow’s eve? If your answer is yes, then look no further. All the tricks and tips to making a boo-tiful, hauntingly fang-tanstic pumpkin are right here. Just follow these steps and you will cast a spell on anyone who sees your dreadfully delightful pumpkin! There are two different ways to decorate your spooky pumpkin: painting it by hand or, if you dare, carving out the spookiest or cutest jack-o’-lantern around.
CARVING YOUR PUMPKIN
Step #1- Picking out a Pumpkin That Is to Die For

Publix offers a wide selection of pumpkins!
First things first, you need to pick out a pumpkin. Miami has an abundance of stores where one can get their pumpkins. Be sure to buy a good sized pumpkin as ample room is necessary to carve a design. Once you’ve selected the pumpkin, make sure it is in good condition as some get scratched up or have bumps. A pumpkin patch would serve as a great place to pick up one of your choosing, but nearby places such as Publix and WinnDixie usually bring in pumpkins at the start of fall.
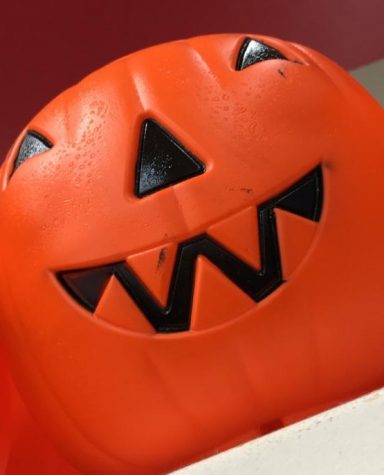
Get your scare on! You can never go wrong with a traditional pumpkin face.
Step #2- Choosing a Wicked Stencil or Kit
This is the moment where you look inside your cauldron at all the different kits you’ve chosen and realize you don’t have enough materials for them all. Try to pick your favorite of the bunch, you’ll always have next year to try something different. Stores like Party City, Spirit of Halloween and Walgreens all have kits in stock in for the Halloween season at hauntingly low prices. If you don’t want to spend money, there are many online websites where you can find free stencils. Google Images serves as a perfect alternative; when searching for a template just type in ‘pumpkin carving stencils’ and have fun choosing your very own!
Step #3- Setting Up Your Evil Lab to Avoid a Mess
Messes are inevitable, but keeping a clean work space is key to minimizing them! Place garbage bags all around your work space as it will keep the pumpkin’s insides from spilling out onto the floor. The garbage bags placed on the ground will make for an easy clean up afterwards. Another solution is placing newspapers underneath and around your pumpkin, but a garbage bag is always a safer and relatively mess-free solution.
Step #4- Now it Gets Gruesome
Continue at your own risk! Once you have finished setting up your work space it’s time to begin prepping your jack-o’-lantern. What you want to do first is very carefully trace over where the lid will be with a permanent marker. Make your lid big enough for your hands and tools to fit through. Once you’ve finished tracing your lid, begin to cut along the lines and remove the lid as soon as you are done. Using a scraping tool, your hand or a spoon, scrape away the insides of the pumpkin, there should not be any string or seeds left within.
Step #5- Time to Become Dr. Frankenstein
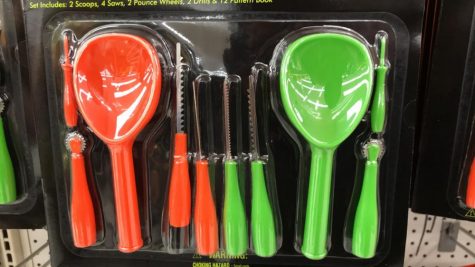
Party City and Kmart have various options for carving kits!
The moment you’ve been waiting for- time to carve your pumpkin! After all this hard work, your pumpkin is ready to be carved and turned into a monster. Now you can take out the ghostly carving kits or templates and get your spook on, picking out the template you like best. Once you have done so, firmly place it on your pumpkin and trace. Some kits come with a dotted line template, use a drill to punch small holes into your pumpkin. If your template does not have the dotted lines, outline your design with a permanent marker and then use the pounce wheel to cut the small holes in the pumpkin. When you finish outlining the template, it’s time to begin carving with a kitchen knife or saw that is provided in the kits. To do so, poke the knife all the way inside from where you want to start. Begin to glide the knife around the outlined area, repeating this until you finish cutting what you need. Once you finish, push the shapes out and carefully run the knife around the edges to smooth out your design.
Step #6- “There is Magic in the Night When Pumpkins Glow with Candlelight” -unknown
You have finally finished your pumpkin, and now it is time to light it up. The final step is to finish decorating by possibly adding stickers or skewers to represent body parts, make your pumpkin as unique as you would like. The most important thing to do after you have finalized your decorations is to pick a candle and place it inside so your pumpkin can light up the nighttime. Once you have completed your pumpkin, you will ward off the evil spirits in style.
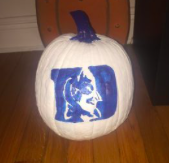
There are endless possibilities for design when painting a pumpkin.
PAINTING A PUMPKIN
If pumpkin carving is not your forte, then grab your wands and cast a spell, because painting is a fun and relatively mess free way to decorate your Jack-o’-lantern! Just follow these instructions and you will be the witch or warlock of the town.
Step #1- Clean Your Pumpkin
Once you’ve already selected your pumpkin, it is time to clean any dirt that might be on it. A damp paper towel, or a baby wipe, is a great way to clean your pumpkin without damaging its skin. Avoid wetting the stem and the bottom as this could potentially cause your pumpkin to rot.
Step #2- Choose a Fang-tastic Design
It’s time to choose a design that screams Halloween! Look online at websites like Pinterest or Instagram for inspiration and try to find a design that is right for your pumpkin. Almost anything can be sketched or drawn onto a pumpkin, so you are not limited by practicality in this choice. If it is a small pumpkin, try to find smaller designs. The designs will look better if you stay within your pumpkin’s size as the painting will be proportional.
Step #3- Orange and Black and More Colors than That
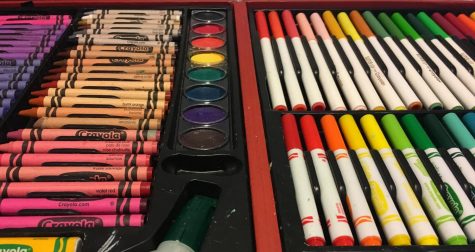
You’ll cast a spell with these colors!
Dip your brush in blood and begin. It is now time to let your artistic side shine through and onto your pumpkin, it’s painting time! If you want, you can add a sealer onto your pumpkin before you begin painting, which helps the paint stick onto the pumpkin better. There are many different ways you can paint the jack-o’-lantern: you can paint the whole pumpkin a solid color and then paint onto it the design or you can outline your design then paint it in. Remember to use acrylic paint! If you decide to paint your pumpkin completely and then add a design to it, try to use contrasting colors. A fully white pumpkin with a black design, or a fully black pumpkin with a white design are some ideas for a great design. If you are just going do an outlined design onto the pumpkin, you want to carefully pick a design that fits within your pumpkin. You could do a white skull and then paint it in with vibrant colors. Just make sure you love your design and to have fun with it, go crazy and enjoy.
Step #4- Be The It Witch
Once you finish, it’s time to place your creation in a visible area so all the ghouls, witches, vampires, and the like can admire or be frightful of your pumpkin! With a beautiful design or an amazing carving you will sure be to haunt the town. Pumpkin carving and painting, are fun activities that will bring everyone together for a great time and will surely be a blast at any get together. Grab a pumpkin, some tools, maybe even some paint and start making a pumpkin for this Halloween season. Happy Hauntings!
[powr-comments id=afa59d59_1507868052693]